Thursday, June 28, 2012

Cake Decorating 101 - Graduation Week 4

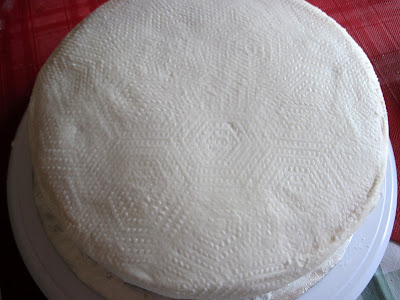
Yesterday's final assignment was to bring an iced cake to class. This time, I made a white cake, filled it with lemon and iced it. Notice how nicely my filling stays inside my dam? While surfing the web, I found a new idea for smoothing icing. I tried it instead of using parchment paper. Recognize the pattern?

A paper towel gives the icing a textured look.

Made a dam. Put filling inside. Forgot to take photo so I lifted
top cake layer and left crumbs on dam.
                                                                                                     

In class we learned to make roses. I was very slow and unskilled. Most of my flowers dissolved into a mass of ooze. I clearly need further practice.


 We also learned how to do lettering...printing and writing, easy.

Then it was time to decorate our cakes. I decided I didn't want mine to look like the one in the instruction book. Cakes with roses look like every cake at the local supermarket bakery. Besides, I was a buttercream rose failure. As the rest of the people in the class feverishly made rose after rose, placing their creations gingerly atop their cakes, I had an idea.

My thoughts ran wild. I needed different colours of icing. I also required other tips on my icing bags. While my classmates worked hard, hunched over their cakes, I played and mixed colours. The instructor asked whether I had given up as she delivered my certificate of completion.


What? Me? Give up? Never. I just like to take the time to think, dream, plan and create my own thing. Here's my final cake, slightly bruised and squashed from sliding while in transit, but nonetheless, I'm happy with it.


Of course, my thinking and planning didn't end here. I came home and I decorated.


And now, we celebrate. Happy Canada Day and of course, Happy 4th of July to all my American friends and family.


Thursday, June 21, 2012

Cake Decorating 101 - Week 3

Cupcake decorating is different. I kind of like it, although it seems like a lot of effort for a treat that gets sucked down the throat in one fell swoop. I opted not to fill the cupcakes. I have a special icing tip that does that easily which I might use in the future. Baking them was also relatively simple. My cupcakes ended up on a slant. Great if you want to make mountains or ski hills.

The instructor said, "Crooked cakes mean that an oven isn't level."

Hubby said, "How does she know it isn't the floor or the house that's not level?"

My cupcakes shall remain eternally lopsided as I don't have the interest or inclination to get a level, lay it on my stove and try to spin those teeny little feet on the bottom of stove in an effort to solve the problem.

This week, preparing the icing took the longest. I required several colours for flowers and I especially needed green. We learned how to make leaves. I thought I was being terribly clever and prepared my icing bags with appropriate tips in advance. Unfortunately, everytime the instructor said, "now get icing tip number ...", I didn't have it, couldn't find it or already had it connected to the wrong colour. So much for saving time being efficient and organized.

After practicing a variety of different techniques, lines, shapes, leaves and the like, we made a pom pom flower. This was done on a small circular plastic platform covered with a tiny square of parchment paper and attached to a golf tee. Did I mention that the temperatures have been close to 40 degrees celsius lately? This is my slightly melted pom pom flower.


When many flowers are needed, they can be made ahead of time, chilled and placed on a cake later. I tried to save my flower but it dissolved. Cake decorating is definitely an activity for either an air conditioned space or a cold winter's day.

We were then left on our own to decorate our cupcakes. Again, time was running out and I started to panic. As a practice, I made a shaggy flower on top of one cupcake. After all, I still had the icing and tips intact. Then I became a bit more creative, making an alien, a flower with leaves, a lamb and a caterpillar before packing up. None of my efforts were spectacular because the icing became very soft and couldn't be properly smoothed.


I promised this week's finished products to my daughter and delivered them to her place of employment. By the time I got there in the heat, the caterpillar's nose was stuck up the lamb's butt and the flowers had dissolved into a meadowlike mass. Not a pretty sight. Nonetheless, she was appreciative and noted their cuteness.

I have learned what I already knew. Just as with any other skill, in order to become good at this, many hours of practice and dedication plus a strong back and legs are needed.

Next week, is our final week of session one. We need to bring another cake. This time, already prepared, filled, frosted and ready to decorated. We are learning how to make more flowers and how to write on top of a cake. Hopefully, the finished product will have the potential of looking vaguely like this illustration. Wish me luck.

If I can create this, I get to advance to Cake Decorating 201, "Gum paste and flowers".

Wednesday, June 13, 2012

Cake Decorating 101 - Week 2

This is our classroom prior the the mayhem we created with our decorating efforts today. There are seven of us taking the course. For the summer, the classes at the local Michael's are half price. What a bargain. For only $22.50, we get four weeks of instruction and all the mess stays here.

Not only did my second baked, late night, chocolate, dairy free cake turn out a success, it was the envy of everyone as the scent wafted through the air in our classroom. Others had opted for white cakes.

For today, I needed the following supplies - a cake, buttercream icing in two consistencies, cake decorating kit, a cake box, cake filling (I opted for cherry), two cake boards, piping gel, a cake leveler, a turntable, icing colours, water squeeze bottle, plastic cups, toothpicks, waxed paper, parchment paper, scissors, note paper, pencil, wet cloths and a partridge in a pear tree. I forgot the wet cloths and, as it turned out, I didn't really need the partridge...not too bad.

I was shown how to slice my cake with a cake leveler rather than a knife. It was beautiful and even and I could see the multitudinous holes inside where I had inserted toothpicks to test for baking "doneness".


Next, I filled one of the piping bags with white icing and made a dam. This keeps the filling from oozing out. The filling was then scooped inside. Apparently, less is more. I had too much and needed to remove some cherries. At this point, I imagined that if I had just drizzled some rum on the cake and possibly added a thin layer of cream, I could have turned the whole thing into a Black Forest cake. That however, was not the point of this exercise. I replaced the top of the cake (without pressing down...a key element in lesson one) and iced the outside with one hand while rotating the turntable with the other. This was a "pat your head and rub your tummy" type of challenge and ohhhhh what a mess.


There were several design options for the top of the cake. One choice, was a hamburger. This appealed to my sense of humour since I was going to be giving the cake to my *** vegetarian son. However, I decided to go in a cuter direction.

Can you guess what this would eventually become?


If you said, "a duck", that would have been a good guess and an obvious choice for those of you who know me. But no, in fact, I selected a fish. When I checked my watch, I realized that our time was almost up. I couldn't finish my design at home because I was delivering the cake to my son, so I had to complete it in class. Unfortunately, finishing it in haste, created a degree of uneveness and sloppiness. I will definitely practice this week and try to do better and work faster on lesson three, cupcakes.


***Giving the cake away to a skinny person with a good metabolism prevents having temptation in the house of people who don't need the calories. In this particular case, fish is not a good food choice.

Tuesday, June 12, 2012

Preparation Perspiration

Wow! Who knew it would be so difficult to learn to decorate a cake? At no point did it occur to me that in order to learn to decorate cakes, one would actually need cakes, icing, tools, and mountains of decorating paraphernalia.

My challenge was to bake an 8 inch cake and mix two containers of icing to take to class tomorrow.  After realizing I only had half a bag of icing sugar, I checked the buttercream icing recipe to see how much more I had to purchase. I made a list of everything I needed and went shopping.

Each batch of icing, required one pound of icing sugar. Sounded simple enough. As I neared the appropriate aisle at the grocery store, I found the sugar.. "Hmmmm", I thought."I need two pounds." I saw bags that contained the words "one kilogram" and my life flashed before my eyes. Inches, feet, yards, pounds, miles, acres, cords, gallons, fluid ounces. During my youth, I could barely fathom imperial measurement. Then, along came metric. It was in a league of its own, although I thought I finally had it mastered. At no point did my brain register what I clearly knew. One cup is eight ounces, therefore I'd only need four cups for my two batches.

I tried to make it far too complicated. "Let me see," I said to myself. "one pound is 2.2 kilograms."

I have no idea where I got that absurd idea for conversion. Clearly the gray matter wasn't firing on all cylinders. Perhaps I was confused with one mile is 2.2 kilometers, or 2.2 fahrenheits make a celsius, or a metre stick and a yard stick are almost the same except for the 40 inches. Who knows? Essentially, here's what I calculated that I needed.


The bag on the top is the partial bag I already had. The only difference is that I used four cups out of it for the icing and still had most of the bag left. As it turned out, the recipe was simple and my buttercream icing is perfect (no actual butter was harmed in making that trans fat delicacy).

It's late now. It was very hot today. I still need a cake. My second cake is currently baking in the oven. I waited until evening to avoid overheating the house. Although the measurements were precise, the first cake refused to bake properly. Murphy's Law. I used all the helpful handy baking hints we got at last week's class.

 I need a cake!

If the second cake doesn't turn out, I'll be forced to use my tub of icing to decorate the other tub of icing. After all, I certainly have the ingredients to make a lot more of it.

Friday, June 8, 2012

Rambling Robins

Every year, we have a family who lives under our deck. For some reason, robins like to build their nests in the cross beams. We see the activity and we hear the parental fuss when we dare to venture near. Here's what I found yesterday.


Tonight, I went to check on the birds. The nest was empty. As I looked around the yard, I did notice a problem.


Then, I saw more of an issue. It was also a concern to the parent robins who were clearly watching. I no sooner tried to take a photo, then I was bombed. A large scoop of vanilla ice cream dropped on the front of my shirt, couldn't have made more of a mess. I made an attempt to get closer to scoop up the birds and return them to their nest. It wasn't to be as they fluttered away, not flying very well, but nonetheless they were moving.


I was pleased when a little while later I saw one of the birds perched on the fence. It had successfully lifted off. Hopefully, the rest did the same.

Thursday, June 7, 2012

Cake Decorating 101- Week 1

I have always been fascinated by people who have the ability to make cakes look beautiful. My mother had that skill. I have no idea where she learned it, but by age 20, she was the envy of Northern Ontario.

She showed me the Dr. Oetker cookbook which was her inspiration. Not only was it written in "ye olde German" script, but the faded colour photos gave no instruction as to how one creates these masterpieces. She just did it. People flocked to our house for a slice of torte and I always had the best attended birthday parties.

Over the years, I have tried. I have created some nice enough cakes and cupcakes. I've even managed a few black forest cakes. I've molded and painted tiny marzipan fruits to highlight the top of a chocolate shell. I was particularly proud of a Father's Day effort which was covered in Smarties to resemble a shirt and tie. That was easy, anyone could do it.  I followed a pattern. When I attempted my son's "Ninja Turtle" cake (blog Aug. 27, 2011), I realized that icing and fondant were a huge mystery.

I recently enrolled in a cake decorating class. Yesterday, was my first day. The instructor announced her impressive credentials and proceeded to ask why each of us was there. My answer was simple. "I'm retired and I have the time now."  She then said that this would be the first four weeks of a seventeen week course. Uh oh. I don't think I have the time.


We were told that we would all proceed at our own skill level and that we would develop our own "style". There are no such things as poor efforts, bad decorating or ugly cakes. Really? Then she mentioned that she would very quickly be able to evaluate our ability. Our first task was to decorate cookies. Lesson #1 in the instruction book contained some examples.


The first class went quickly. By the time I was finished, I was able to successfully make rosettes on cookies. They looked exactly like the photo above...well, almost. The instructor praised several people's efforts. She seemed disinterested in mine and made no comment. She was clearly so dazzled by my natural talent and creativity that it rendered her speechless.


I garnered some important information which seems obvious, but I didn't know before.

1. When slicing a cake to fill, cut through the middle but put a toothpick at the top and bottom half before taking the layers apart. That way you can replace it in the exact same place to keep the cake level. No need for extra filling to level the cake? No trying to make it fit and ending up with a slanted cake? Why didn't anyone ever tell me?

2. Make a buttercream icing dam between two layers of cake. In other words, cut the cake in half, make a ring around the edge with icing, then put whatever choice of filling in the middle. Then it won't ooze out. Clever. Also, do not press down on the top of the cake when the layer is replaced...same reason. By not pushing down, the cake also becomes taller.

3. Use more icing than you need. It's easier to remove than to add icing. This also avoids getting crumbs in the icing, so no more crummy cakes.

4. Some parchment paper, smoothed over rough portions of the cake, then removed, help give it that all over even look.

For next week's class, we need to bring an 8 inch cake to decorate. I'm looking forward to it and have already packed most of my required materials. Hopefully, I'll be able to share photos and instructor comments about my effort.

Sunday, June 3, 2012

Picture This - The Beginning

It's a daunting task. For those of you who have accumulated mountains of photos during the last half century and stored them in boxes, you know what I mean. It's now or never. Time to organize. Oh, I have albums too, lots of them. Many of those, either have pictures missing or photos that have faded  from the old style acidic pages. So, where to start?

I have sorted before. It's difficult to do. In fact, it's impossible to do without enjoying and reminiscing about each picture which passes through one's hands. The important thing is to be realistic about a time frame. If you have a trunk full of photos, don't expect to get them sorted in one day. It's a long term project. I have started. I am now giving myself a month but can go to six weeks if necessary. There are obviously other things which also demand our attention each day. At the end of that time, I hope to be downsized and organized enough to eventually start on a few major albums. As I've mentioned before, I want to complete a family history, plus a book for each of my adult children. We'll see how I progress.


During previous sortings, I came to the realization that it's not necessary or possible to save everything. There was a time, where a second, even third set of pictures was offered for a small processing fee. Unfortunately, many of us accepted that option which now adds to our chaos and clutter. In my downsizing, I have seen too many photos of blurry people, odd body parts and strange places. In fact, I've seen some in triplicate. They are now in the trash. Photos containing people I don't recognize are sadly also in the garbage. Pictures of scenery or those which show family members in an unflattering pose have been discarded. Finally, the acidic albums are gone. I was able to save some but not all of the disappearing pictures which were gummed to the pages.

Then, there are the slides. I have finally found a portion of my life story which had been missing. It's in the form of slides. So far, I have considerably reduced the numbers of slides. After locating an old slide viewer, I managed to go through, remove and dispose of all the images containing roads, waterfalls, mountains, beaches, rocks, flowers, palm trees, resorts, tents...scenery. If I want to see those things, I'll look at pictures on google. I have set aside 150 slides which contain family members and I will report back when I figure out what to do with those. I think I recently saw an offer from Black's...slides and negatives put on a cd. Then I could make a few prints or collages, because after all, for how much longer will we have the technology to be able to view cd's?

All negatives have been boxed and labelled. I will not throw those out just yet since I know that there are some negatives which I may still want. Will I ever actually look through them all? We'll see. When I finally do toss them out, I'll feel extremely accomplished, liberated and satisfied.

Finally, the photos. For my purposes, I have decided to organize them into people, important events, and themes. I have difficulty with "chronological" order so I will use these themes to create my albums combining photos of all types, current and older.

Here's an example of one page which I have almost completed. My son has experimented with many colours and styles of coiffs over the years, so have entitled it, "Hair". For fun, I've included some lyrics from the musical, "Hair". The page, when completed will go into his album. By using this method, a lot of photos are included in a small space.


To any younger person just beginning the photography cycle, I have a recommendation. If you have photos on USB ports, on the computer, on camera cards, on your cell phone or on any other piece of technology, print one photo of each major event in your life. Go for a larger picture 5x7 or so. You'll appreciate it in your old age. Be sure to label it with the date, the names of any people in the picture and the location. Then find some form of quality album and add the picture as necessary.

 If someone had given me this advice, it would have saved me the enormous amounts of time I'm going to be spending with this project now.

I will update my progress from time to time and continue to share what I learn about photo downsizing, disposal and display.